Window Boxes

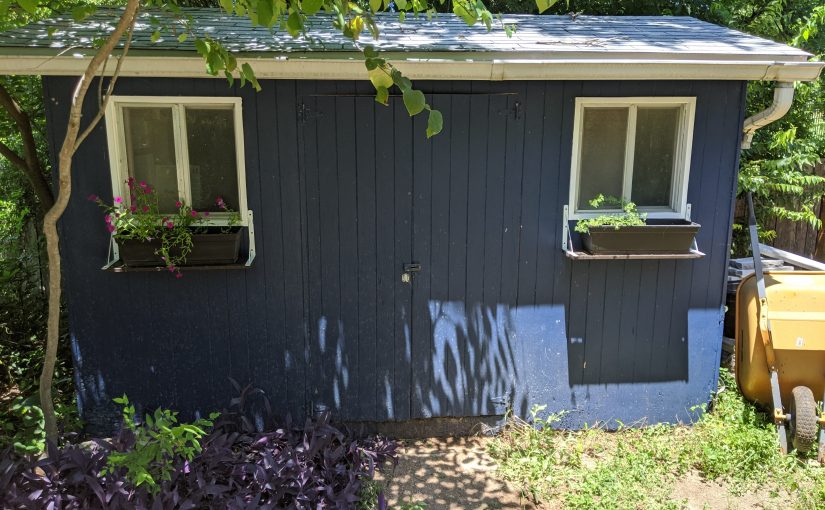
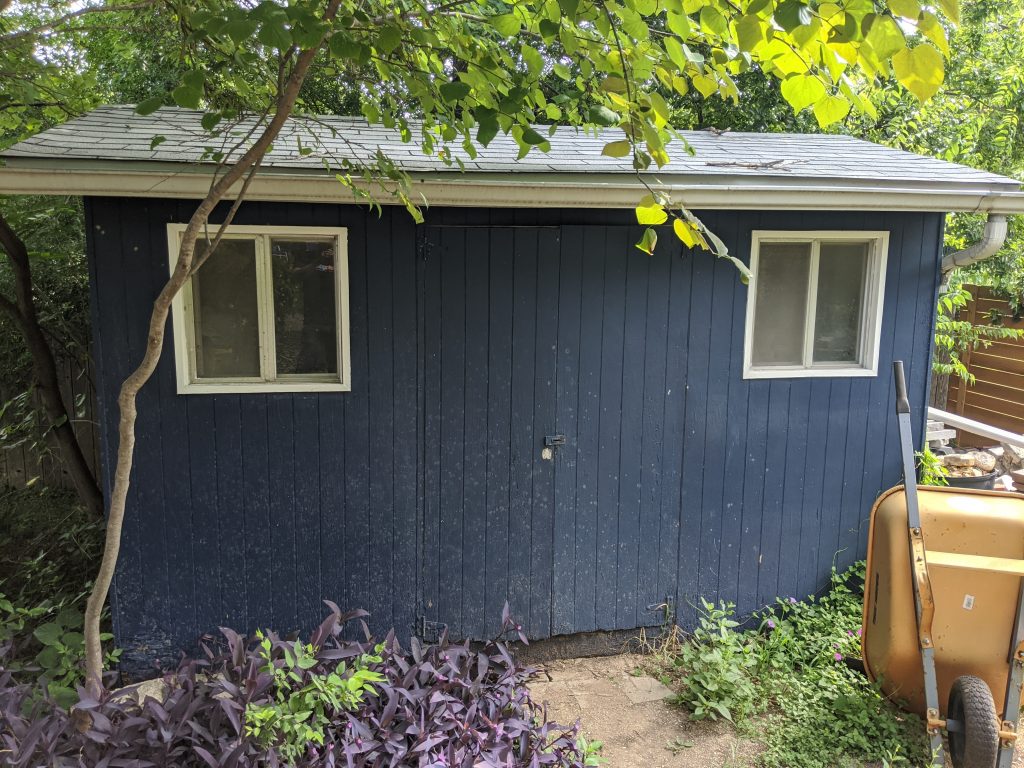
The shed is part of our yard that I have mostly come to terms with. We painted it about 2 years go. We were mostly happy with it.

Then we had the pool put in. In doing so we had to take down a row of hedges and suddenly it became very prominent when floating around the pool. Julie touched up the windows with white paint and we made plans to build window boxes. We make lots of plans while floating in the pool.

Before. The dirt splashed shed.

I went looking for pre-made window boxes and was stunned by how expensive they are. We weren’t really looking for a $600 project that ended with very traditional looking window boxes. So I ended going with some pre-made deck railing planters and shelf brackets.

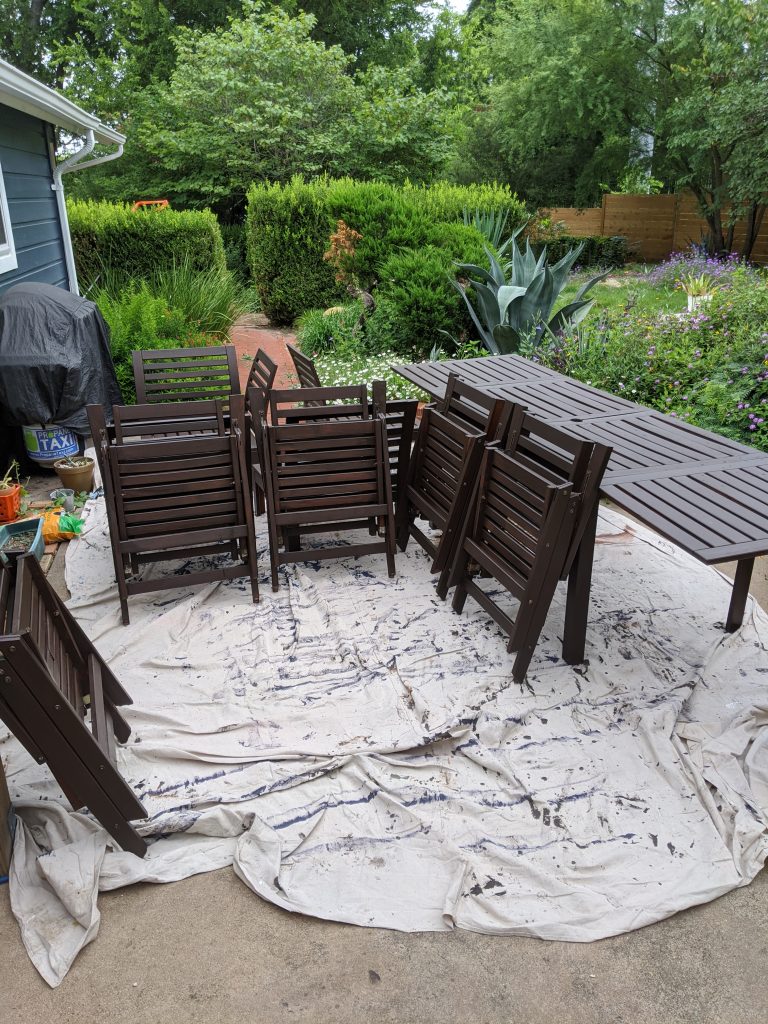
Then, because I’m having extreme motivation problems thanks to COVID, they sat there for a couple months. But I got energized during the July 4th weekend and built the shelves. And stained them. And then stained all of my backyard furniture.

Clearly a little too energized.

They are very simple. I just used 4 pieces of 1×4 and cut them with a handsaw to be slightly larger than the windows. Each shelf is 3 pieces of wood. I put shims between them to provide a nice drainage space and then attached the brackets with screws. The stain was left over from the Decorative Wall Panel project. And the lumber was a side-effect of having a theatre company. We always have lumber.

It was a very un-fussy project. And I’m really happy with the outcome!

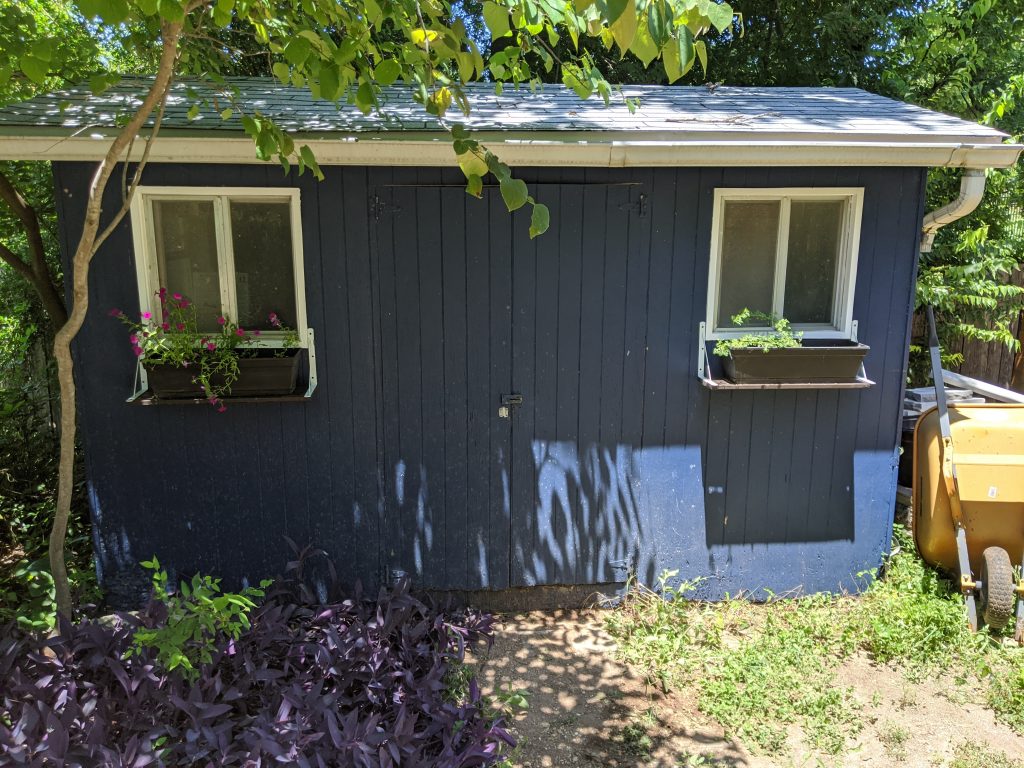
They look great from the pool. But it’s too bright and hot right now (109 heat index!) to take that picture. In any case, I’m really happy with them. Both of the plants are just volunteers I dug up from my paths. The left are “Laura Bush” Petunias and the right is Moss Verbena.

Any ideas for more mostly shade plants are welcome in the comments. I’m thinking about trying some Drummond Phlox next year.

A New Path

The pool we’ve been putting in is pretty much done. But we can’t swim yet, and everything is still a mess. It’s juxtaposed with all the flowers, birds, and insects enjoying this lovely spring.

We were going to start adding in flowerbeds today. But Julie stopped me and pointed out my vision for brick planter walls wasn’t aligned with her vision for a path to the pool. So we discussed the pool path.

It wasn’t what we planed to get done today, but we both think it looks fantastic. We’re having buffalo grass delivered tomorrow that will fill in most of this area and be in between the pavers.

From the pool deck:

The bricks ides aren’t quite lined up properly, but you can see the yuccas on either side look like we almost intended a path there when we planted them.

And looking towards the house. I really like the green of the yucca with the navy paint.

We’d eventually like a bathroom inside that pink door so this path is pretty important to that vision.

Everything needs a pressure wash, though… ergh. Also if you ever think about buying pre-cast concrete pavers they’re very hard to line up because they’re only vaguely the same size. It’s one of those cases where you have to be exact up until the moment you have to eyeball it to make it look sane.

You may recognize these pavers from the initial xeric conversion of the front yard.

Build a Plant Bench

This year I actually remembered to bring in my plants. It’s a Christmas miracle!

Etta and I worked together and built this bench. Our friendly elf liked it so much she had to join in on the fun.

Here are the instructions if you’d like to build one of your own.

I already had:

  • a hand saw
  • a drill
  • a large-ish drill bit
  • a star drive bit for the lag screws

So at Lowes I purchased:

  • 1 6x6x8′ pressure treated beam
  • 4 of these bolts
  • 4 of these washers
  • 1 package of these legs

Once you get it home figure out how long you actually want the beam. Probably not eight feet. We went with about 65 inches. Mark where you want to cut it and then cut with a hand saw. Tedious, but it works.

Mark where you want the legs to sit and mark the holes with a sharpie. These legs are made to attach to a skateboard, but really two bolts on each side is all you need. I did them diagonally, two bolts on each side. Drill pilot holes with a fairly large drill bit, then screw in the bolts with the washer on the outside of the leg.

That’s it!